Call: (707) 570-0555 | Email: info@cleancrawlspace.com

restoration clean up

Tag Archives: Vapor Barrier

crawlspace under home

Is Your Crawlspace Contaminated?

Odds are, you probably don’t spend a whole lot of time in your crawlspace

But if you find yourself sneezing, coughing or noticing a musty smell coming from an unknown source, it’s time to check out your crawlspace for contamination.

How Crawlspaces Become Contaminated

There are several ways your crawlspace may become contaminated:

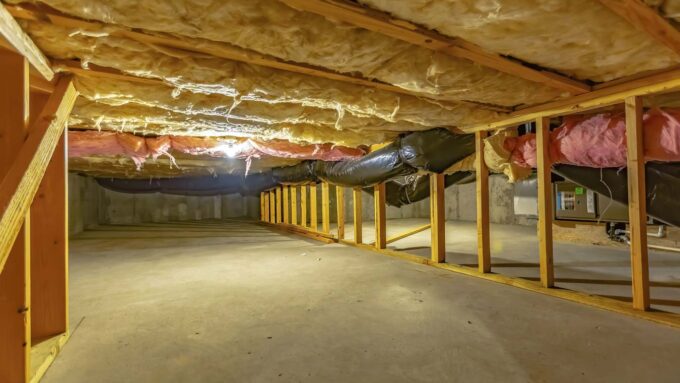
  • Insufficient Insulation

Over 1/3 of your indoor air rises up through the crawlspace. If the crawlspace is not properly insulated, expect to pay higher energy bills. Non-insulated spaces also tend to attract more insects, rodents and mold.

  • Improper or Missing Vapor Barrier

Since vapor barriers protect from excess moisture and humidity, they significantly decrease the odds of mold growth. Vapor barriers also provide protection from insects and rodents, while keeping indoor temperatures more stable and comfortable.

  • Excessive moisture, humidity, and/or water
  • Condensation on plumbing pipes
  • Insufficient vents and air circulation
  • Rodent excrement, nests, or infestations 

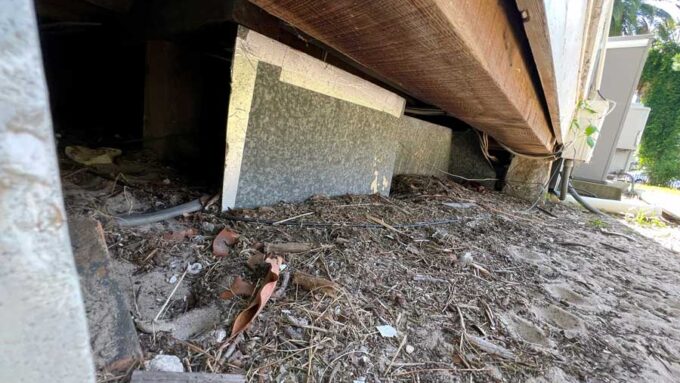
Signs of a Contaminated Crawlspace

When checking your crawlspace, look for these signs for what could result in potential contamination:

  • Visual inspection for damaged or missing insulation, vents, or vapor barrier
  • Damage to wooden joists, structural or support beams
  • Rodent damage caused by chewing through electrical lines or insulation
  • Standing pools of water
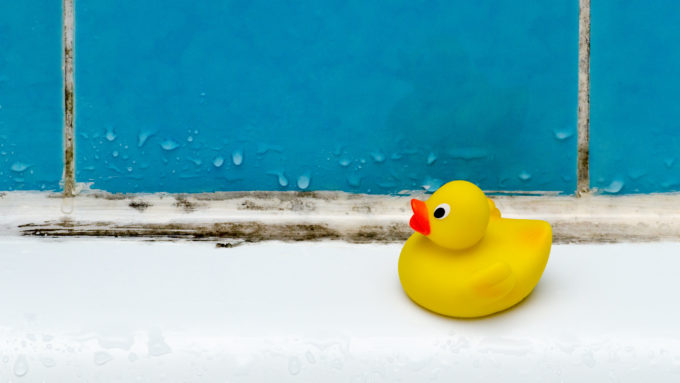
  • Visible mold
  • No encapsulation of a dirt floor crawlspace

Negative Effects of a Contaminated Crawlspace

As long as the crawlspace goes unchecked or stays as is, the odds of contamination increase. 

Here are some of the negative effects of a contaminated crawlspace:

Poor Air Quality

Since air from the crawlspace rises up and into your home, breathing in air particles containing dried rodent excrement or mold spores and mycotoxins on wooden beams, walls or the crawlspace ceiling can cause or aggravate existing health conditions such as asthma or allergies. The air can literally make you sick.

Higher Energy Costs

If your crawlspace lacks adequate insulation, you’re losing money every month on your heating and/or cooling bills. The furnace and air conditioner have to work longer and harder to keep your home comfortable due to conditioned air escaping through the crawlspace.

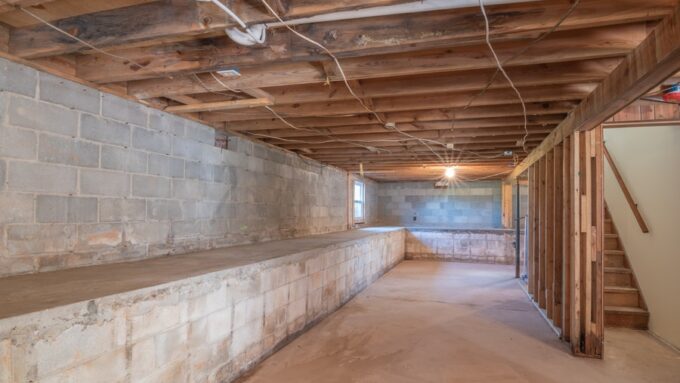
Structural Damage Inside the Home

If mold and water damage the ceiling of your crawlspace, it will eventually affect the integrity of your home’s subfloor and flooring above.

Additionally, damage to wooden support beams and posts compromise the very foundation of your home.

Rodent Damage

From using insulation for a nest to chewing through electrical wires to leaving behind urine and feces, critter proofing and protecting your crawlspace as much as possible helps keep rodent residency and destruction to a minimum.

Conclusion

To prevent the damage and negative impact of a contaminated crawlspace, take a look to see what’s going on down there.

If you spot problems with insulation, structure, water, mold, or any other potential contamination factors, don’t hesitate to bring in professionals.

To identify and eliminate contamination and restore your crawlspace to a clean, healthy condition, call the crawlspace cleanup experts at RCS to schedule an inspection today.

unfinished basement

Is Encapsulating Your Crawlspace Under You Home Good?

If your home has a crawl space in it, you might be wondering about the proper maintenance and care of that area of your home. The answer is different depending on your crawl space, your property, and your home. Understanding how to care for your crawl space begins with understanding why it’s there to begin with.

Popularity of the basement crawl space underneath homes begins around the time industrialization also occurs, around the 1950s. Homes built around this time often have crawl spaces if they don’t have a full-blown basement space. They are also used when a full basement would be too expensive or impractical given the geographic area. Many of the original crawl spaces were between three and five feet tall, had open-air access, and were often used as mini versions of a basement.

We now know, however, that humid air tends to build up in crawlspaces. This humidity and the damp earth create an environment ripe for all sorts of potential problems for a home and its residents. It’s important to maintain and keep this area clear and clean for the health and safety of the home’s residents.

As with any type of basement, moisture can become a problem and seep into the crawl space via the soil. And as with any type of water problem, the best way to avoid crawl space moisture issues is to focus on the source. If you have a dirt crawl space encapsulation is likely your best option. For a bigger space, or a bigger crawl space, you might want a different solution. If you do encapsulate, don’t do so without a fully sealable space – it won’t fully work if there are large air gaps. Also be sure to account for drainage.

Encapsulating your crawlspace provides a moisture and vapor barrier between your home and the earth. The area in and around your crawl space is critically important to the structural integrity of your home. Ensuring a proper level of moisture in the space is key. This is also a good time to determine if you need to insulate the upper level of your crawl space and provide some added energy efficiency benefits to your home.

If you decide to encapsulate your crawl space, be sure to get in touch with a professionals at RCS in Santa Rosa to help you.

clean and tidy crawl space

3 Ways to Prep Your Crawl Space for Fall

As summer comes to a close, it’s vital that you prepare your crawl space for the fall. Below you’ll learn more about frequent fall crawl space issues and few ways you can prevent them.

Common Crawl Space Problems During the Fall

One regular issue during this season is mold. Because crawl spaces are enclosed, they can collect mold spores easily. With the humidity inside crawl spaces, these particles can quickly spread and encourage mildew. Over time, it could get sent up into your home which can contaminate the air and lead to respiratory issues.

Another problem is pests. As outdoor food sources start to slow down, some pests might investigate your crawl space in search of some. This can be especially problematic if you keep trash cans and edible debris in it. Not only can this invite diseases into your crawl space, but it could lead to structural damage if they start chewing on or burrowing into the walls.

3 Tips for Prepping Your Crawl Space for Fall

Add a Vapor Barrier: You might want to add a vapor barrier to your crawl space. This sheet creates a thin yet powerful layer around the walls and floors preventing moisture and pests from sneaking into it.

Check for Cracks: Another critical thing to do is inspect the crawl space for cracks. These might seem like a minor issue, but even the smallest one can invite water and moisture into the section. Because there isn’t a place for it to go, the water and moisture will linger inside. This could lead to structural damage and mold growth.

Because of this, do a thorough inspection of the crawl space, especially around the edges. If you notice anything in the walls, flooring, vents, or doors make sure to seal them immediately.

Add a Ventilation System: It’s important that your crawl space has adequate ventilation. This ensures that the space doesn’t collect moisture. It also prevents contaminated air from traveling into your home’s ductwork. While you can have a major ventilation system installed, you could also plug in an air purifier. This can remove allergens and other debris from the air. It will also keep moisture out.

Getting your crawl space ready for fall is vital if you want to keep it in good condition. By keeping this information in mind, you can ensure it is. If you have questions about it or would like a professional to inspect the space, contact RCS in Sonoma County. We’ll be happy to answer any concerns you have and get your crawl space ready for the season.

moldy bathroom santa rosa

Beating Bathroom Mold To The Punch

As the adage says, an ounce of prevention is worth a pound of cure. This statement by Benjamin Franklin still rings true today in many life situations. One place where prevention is definitely worth the trouble is in your bathroom, where moisture and dampness can create unhealthy and unsightly mold. Obviously, you can’t expect the one room in the house that is most prone to moisture and frequented by everyone to remain completely dry. Still, there are ways to ensure that the wet conditions that do occur don’t cause you unnecessary grief or money. This article will discuss some preventive measures you can take to beat mold to the punch while keeping your family healthy. First, you need to know how to track down existing mold in your home.

Sources of Mold

Understanding how to prevent mold begins with knowing where it comes from in the first place. The truth of the matter is that this fungus is a part of the Earth’s natural environment, and its airborne nature makes spreading easy. Warm environments like Sonoma are ideal for mold spore growth, and those spores can enter your home on outside air through your HVAC system. By the time mold shows up in your bathroom, it has likely already been forming in other damp areas in your home, such as a ventilated crawl space below the bathroom. If you suspect that mold is forming somewhere else first, contact your local mold remediation specialist to locate and remove the source.

Because it offers perennial dampness for mold to thrive, its formation can become a bigger problem in the bath than in other rooms, especially if there is no exhaust fan for ventilation. Leaks from pipes, sinks or toilets are additional sources of mold growth, and damp rugs, porous grout, wood, and wallpaper are common culprits as well.

Preventing Future Infestation

Since mold formation can begin in other rooms besides the bathroom, the whole house should be included in your prevention regimen. Here are some tips for avoiding additional growth once you have located the source and reduced the threat.

  • Replace HVAC filters on a regular basis and try to use HEPA filters when possible. This will keep the vents cleaner, which results in cleaner air for your family to breathe. When you can see mold growing within the intake vents and around the air ducts and drip pans, it’s time to call a professional. Annual maintenance on the whole system is also recommended.
  • Know the signs of mold growth in air ducts: A strong musty or mildew-like smell throughout the house or feeling irritation in your nose, throat, and eyes when your air conditioner is on are all indicators of mold growth. Experiencing allergic symptoms including a runny nose, rashes, and watery eyes are giveaways of the possibility of a problem, as well as unexplained headaches, feeling nausea, fatigue, and dizziness only when you are home.
  • Use a vacuum cleaner with a HEPA filter, and keep furniture and drapes dusted.
  • If you live in a warmer climate, humidity can be a contributing factor in mold growth, so investing in a dehumidifier can help prevent future issues.
  • Wash or replace your mildew-resistant shower curtain frequently. Vinegar applied to the curtain and allowed to air-dry after each use helps to reduce mildew growth as well. You might consider adding an oil to cut the smell.
  • When you shower or bath, use your bathroom ventilation fan and leave it running for at least a half hour after you’re done.
  • Keep bottles of shampoo or shower gel dry and on a shelf outside the shower.
  • Drying glass and tile surfaces after use will help to deter mold and mildew growth.
  • Routinely check for growth under the sink, on shower doors and fixtures, and around the exhaust fan.

Prevention in a Newly Built or Remodeled Home

If you are having a new home built or remodeling your bathroom, make sure that you have moisture controls in place. In humid climates, vapor barriers should be installed on the outside walls, and insulation should be along inside walls. Foam is usually a better insulation for bathrooms, basements and crawl spaces in warmer climes. Talk to your contractor and plumber about installing a wall for pipes inside the exterior wall. In an existing home, replace the caulking around your tub. If you are using a recessed tub, (one that is attached to three walls) your contractor can make sure that it is properly sealed along each wall.

Since it seems prevention truly is the best medicine, you should make it a priority for keeping your bathroom free of mold and other contaminants. Know the possible sources of mold in your home and start a prevention routine that includes keeping vents clean and dry, cleaning the bathroom at least once a week, and making sure moisture controls are used. Following these simple health promoting tips can allow ou, your family, and your guests to breathe a little easier while beating mold to the punch.

This Is Why You Need A Vapor Barrier in Your Crawlspace

This Is Why You Need A Vapor Barrier in Your Crawlspace

If you have a home with a crawlspace and have ever taken the time to give it a look to see what it looks like you might be surprised at what you discover. The average home’s crawlspace is simply dirt. These spaces are vulnerable to outside conditions like humidity, cold, and heat. In some cases, depending on how water flows on your property, you could even have water running through your crawlspace creating excess moisture and good conditions for mold to grow. A vapor barrier helps prevent this situation.

This Is Why You Need A Vapor Barrier in Your Crawlspace

What is a Vapor Barrier?

 Vapor barriers are made up of materials that are designed to impede water vapor from migrating into your home’s crawl space. A plastic material, or in some instances foil sheeting, is often the material of choice. Often there is a misconception that this stops air flow, but air barriers block the flow of air into your home, not vapor barriers.

Reasons to Consider Installing a Vapor Barrier

The following are only some of the top reasons you could consider installing a vapor barrier in your home.

  •  Limit Moisture

If water can gain access into your home’s crawlspace, it can create humid conditions that are prime for mold growth. Vapor barriers will help keep your crawl space dry.

  • Energy Savings

Many people are surprised to know that the climate of their crawl space has a direct effect on the amount of work your HVAC system needs to work to heat and cool your home. A vapor barrier reduces the humidity in your crawl space thus making it easier for your HVAC to do its job. This saves you in energy costs and extends the life of your HVAC system.

  • Extend your home’s life

In addition to protection from the threat of mold, wood rot can be a very real concern if water or excessive humidity get in your crawl space. Rotten wood under your home can become a tremendous headache not to mention come at a tremendous cost to repair and replace. Vapor barriers protect your wood from rotting.

If you have any questions regarding vapor barriers and your crawlspaces, please feel free to contact us with any questions that you may have.

Different Ways to Prevent Standing Water Under a Home

There is nothing good about standing water in your crawlspace. Crawlspaces create the perfect conditions for mold as they retain moisture, and they lack light. Add standing water to the mix and you’re multiplying the possibility of mold growth. Mold can create serious health problems and can be expensive to remediate. Before you run into such a problem, here are different ways to prevent standing water under a home, specifically one with a crawlspace.

Concrete and Sump Pumps

sump pump santa rosa
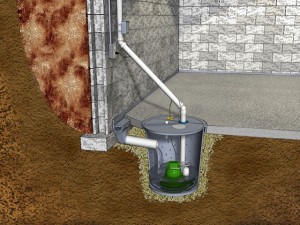
You can fill the space with concrete and install two sump pumps. Two sumps pumps are perfect for larger homes and you’ll have a backup if one of the pumps stop working. The concrete gets rid of mold, mildew, and moisture and it keep water from entering the space as long as the floor is properly graded. It is pretty much extra security. Keep in mind that the concrete is very pricey, and it will need a layer of stone underneath. You can sump pumps without concrete, but it is recommended to check with a local crawl space contractor before making a final decision.

A Perimeter Drain

You can have a perimeter drain installed inside your crawlspace. The pipe is typically four inches of perforated PVC, backfilled with gravel. If you already have a sump pump, the contractor can tie the tube into the pump and drill holes at the bottom of the block to drain out. Keep in mind that it is very labor intensive so most of the cost will be labor.

Check Your Drainage

Inspect the crawlspace for holes leading outside or drainage. Trace the holes outside and verify that they are all properly functioning. Sometimes you might find that one has collapsed or is missing entirely. You may also find that it is facing the house when it should be in a downward position facing away from the house. Simply replace the malfunctions drain or drains.

Moisture and Vapor Barriers

crawl-space-vapor-barrier-01lg
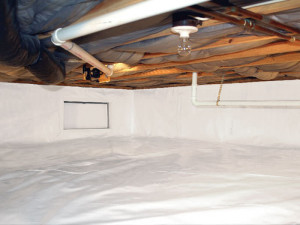
Ventilation is key to keeping your crawl space as dry as possible during winter months. First, a crawl space expert will want to make sure the home has proper cross ventilation all year round by opening vents around the house as needed. If drainage is required, they’ll take care of this before laying down a vapor barrier specifically designed to control mold, rot and pest. This is the ultimate solution to prevent standing water from creating issues to you home.